

Tuesday, October 30, 2012
White with one.....for October
Hello again - today I am ging to show that i can get challenges done SOMETIMES> There was a day many years ago when I would have had the whle list for each month and worked my way through them.....kids, work, family time all seem to have intuded on tat somewhat so Im going to enjoy the bit of scrapping time I do get!! This is a photo of my beautiful family on Uranga Pier at Hervey Bay.....love the colours in the photo so decided it was a good one for white with one....this months challenge is white with one and stars.....so I have white and yellow starry washi tape and a cute felt star from My2angels !!
 so pop over to white with 1 and check it out - they have c some very cool sponsors too!!
Monday, October 29, 2012
And a couple from retreat....
Its a little sad but the best scrapping I get done these days is when I get to go on a retreat - Im lucky- I get to do a couple a year at least and i just LOVE them !! Always a fabulous bunch of girls, late nights, sore sides from laughing and a few new pages to add to my albums _ like I dont have enough!!!
This layout is a simple one but i love the colours and check out the cool bird ribbon from the gorgeous Tracey Thorne!!

And then this one I did just for fun - loving the Charms Creations heart and some washi tape ( of course and a bit of leftover transparency I found in my stash! We had a new underwater camera and we were on holiday at Mooloolaba and we had so much fun taking shots of the kids swimming under water off the water slide!!

Okay - watch out - this is just the beginning I did 20 something layouts so there will be a bit of show and tell over the next week or so!!!! Stay tuned!
Thursday, October 18, 2012
Take note - these are Happy Days
This is a real quick easy layout using some of the papers Tracy has on sale in My2angels.net - they are SUCH A bargain and they are such versatile papers! Echo Park Happy Days!!
here is a fast and funky layout for you!!!
I have used a black cardstock background - you hardly ever see it anymore but I thought it would work well with the bold coloured papers here.....
.I have then used a large piece of red and white spotted paper and created frame with the Happy Days Retro paper around two sections of the paper.

I have then used lots of the Happy Days Borders for the bottom section of the layout including the red stripes.
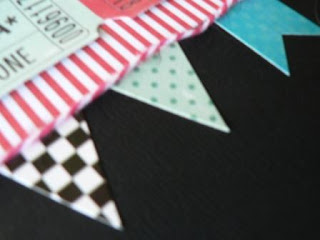
I have cut out the ticket section and made a small banner with the different bits and pieces in the paper range. I have glued Bakers twine at the top of the banner running along the bottom of the red and white striped paper !!
I have then used Happy Days alpha stickers to give it a title and add any embellishments!!!

Saturday, October 13, 2012
Cleaning up my desk and found this one.....
Im not sure if I have blogged this yet or not - I dont think I have but feel free to correct me if Ive done it twice! Oh well.
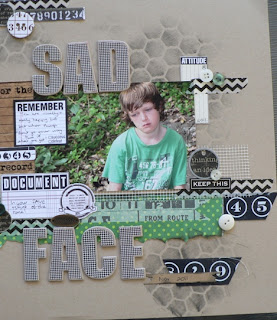
This is my usually Happy Go Lucky Lachlan boy with the grumpies....he can drop a lip VERY WELl - doesnt really do it A LOT but when he does - WATCH OUT!!!
I had fun with one of the Crafters workshop templates from My2angels.....and I just used some black ink and a sponge to do the background.....I then grabbbed some scraps of paper and some plumbers mesh and some washi tape from whatever was lying on my desk and put this together - I really like the colour combo - what do you think?

Thursday, October 11, 2012
Some more PRIMA Craftsmen
Hi all
Back again with some fabulous Prima Craftsman from My2angels. You have to love it when Prima who are SO fabulous at girly pretty papers turn their skills to boyish papers and totally ROCK IT!!!
I have used a Kraft background for this layout as I wanted to create my own grungy look background. I have done this using Tim Holtz Distress inks and some glimmer mist and some Kaiser stamps.
First of all I have used a Crafters workshop mask and some blue glimmer mist .

Then I have added some random sprays of Granite glimmer mist .
Once these are dry I have taken the top of my Mels diner glimmer mist and used the nozzle to drip some more mist down the page. Because I am impatient I use my heatgun to dry the card between layers!!

Finally I have used the Kaiser checker plate stamp and black soot distress ink for some funky ink marks. Layering the different textures and techniques is a fun way to create an interesting background on otherwise boring Kraft cardstock.

I have then cut a square of Tools of the Trade Craftsman paper and stuck this to the left side of the layout. I have used a small strip of Prima black box and tucked in under the top right hand corner. I have also used this same strip to make a skinny banner overlayed over the journal box with the train on it. I have inked all edges as Ive gone to add to the grungy look. That includes the edges of the cardstock!!
Ive then taken the chipboard cogs and inked them with Tim Holtz distress inks and over lapped before applying a random string of twine.


In this photo my son is actually on his bike so I have tied a gorgeous little bike charm on to the end of the string.....

I have then cut out some of the words from the Engineer paper and raised these on adhesive foam for the title.


Add any journalling and Voila - you are done..

Monday, October 8, 2012
14
Here is another layout from the scrapbook savvy recipe challenge set by Sara....a photo of my almost 15 year old boy!!!


Saturday, October 6, 2012
You are my sunshine.....
I had so much fun with these papers - they are from scrapbookingfromscratch and Ive had a few of their kits and I REALLY like them ....here are a few of the layouts I did with this pack and I also made some easy fun cards too.....

and here is another

I have a couple more but I havent photographed them yet!!!

and here is another

I have a couple more but I havent photographed them yet!!!
Subscribe to:
Posts (Atom)


